Thursday, April 29, 2010
Tuesday, March 2, 2010
Sneak Peek
Here's a little sneak peek at what will be in my store when it opens latter this week or possibly some time next week.
Posted by vikingmom at 8:26 PM 2 comments
Labels: sewing
Friday, February 5, 2010
What I've been up to
If been so busy lately sewing up a storm. Thread all over the carpet and fabric scraps all over the house, and its been crazy. I'm trying to get my Etsy shop up and running. There's about 3 dresses complete and I want to have 4-5 to open my shop. In between sewing for the shop I've managed to make something for the pumpkin. I've had this cute pink and black plaid in my stash forever. Then I saw a post on Craftster and decided to make a version for little one.
The Punky Pixie Skirt

Posted by vikingmom at 4:55 PM 0 comments
Labels: sewing
Wednesday, January 20, 2010
Lil Red Retro Dress
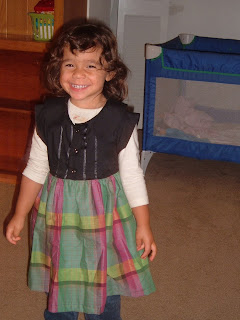
So the other day I got this idea to make the pumpkin a little hipster/retro dress. So I got out my A-line dress pattern, shortened it and took away some of the "A". I didn't think that it would turn out ok; it was more like I’ll try it and if I like it I'll make it again. I didn't serge and I barely ironed the seams. Now I wish I would have constructed the dress better because it turned out really cute. What do you think?
Posted by vikingmom at 5:31 PM 0 comments
Labels: sewing
Friday, January 15, 2010
Pretty Pink Birdie Britches - say that 10 times fast
I won a free pattern from Vegbee. I helped her name one of her new patterns the Birdie Britches. I made these hot pink corduroy pants as a birthday present for one of the kiddos that I watch. This little peanut (that’s what we call her) has such a hard time fitting into her pants. 24-month pants are long enough but the waist is too big and 18-month pants are too short but the waist is just right. So when I won the pattern I told her mom that I would make her some pants that fit right for her birthday.
Posted by vikingmom at 8:23 PM 0 comments
Labels: sewing
Wednesday, January 13, 2010
Quick and Easy Cowl Neck Sweater Dress Tutorial
First you will need to gather your supplies-
A turtle neck sweater the bigger the better
A t-shirt that fits loosely on your pumpkin
and regular sewing supplies
Now lay out the sweater, then lay the t-shirt on top of the sweater making sure that the neck of the t-shirt is lined up as close as you can with the neck of the sweater. You don’t want to cut these seems off, that makes for less sewing. Trace around the t-shirt and add a slight A line shape, like this

Posted by vikingmom at 2:02 PM 0 comments
Thursday, December 17, 2009
Fa La la la la !!!
I finally finished her dress. I started this thing in November. I had to make a pattern, test it, tweak it, then do a practice run at it so I would ruin the pretty fabric. The fabric by the way is burgundy taffeta originally meant for curtains or home decor, but I don’t follow the rules on stuff like that. It was on sale for $5.50 a yard and I only needed one yard. I used gold satin ribbon for the trim and I sewed in an invisible zipper in the back, but I wont be showing you all that because I totally did a bad job. Whipstitch has an awesome tute on how to do one. For the most part I like how it turned out and please pay no attention to the bottom of my tree. I have no tree skirt and the kid’s mess with the bottom, so I covered it up in hoping they would leave it alone.
Posted by vikingmom at 5:00 PM 0 comments
Labels: sewing
Tuesday, December 15, 2009
Fat Quarter Skirt Tutorial
It's here. After a few weeks of procrastinating and Christmas shopping, I finally managed to get this posted. This should fit a 2t-4t, but you might have to adjust measurements for the 2t. So here we go.
1st gather your materials
1 fat quarter
about a half a yard of coordinating fabric for waist and and trim pieces or another fat quarter
1 inch wide elastic
Because my camera got the swine flu and only seems to wanna work when all of the lights are off, there are few illustration and they're made my Microsoft paint.
OK now you cut your fabric. A fat quarter is usually about 21-22 inches that will be the width of the skirt. Now cut your fabric like this.
Now with right sides of the fabric together, sew the waist pieces, the skirt, and the ruffle together. Either serge or use a tight zigzag, the raw edges and press your seams.
Next, using your favorite form of gathering, gather the skirt to the width of the waist and the ruffle to the width of the skirt.
Then sew them all together and serge or zigzag edges and press seams. Now with right sides together sew the side of the skirt and once again serge or zigzag edges along with the top of the waist.
Next fold the waist piece in half, press it down and then top stitch leaving an opening large enough for the casing.
For the elastic casing your want to use a piece about 21-22 inches long depending on your child. I have a tubby toddler with a belly. She likes to wear things below it so sometimes I need a snugger fit. OK, now attach a safety pin to the end of the elastic and feed it through. Sew elastic together, top stitch the opening closed and lets hem the bottom.
The bottom of the skirt can be done whatever way you like it. You can hem it, serge it, lettuce edge it, whatever you like. Then you're done!!!
Sorry for the lack of pictures. Once I get a new camera I'll update the tute. If you have any questions feel free to ask.
Posted by vikingmom at 8:48 PM 0 comments
Saturday, December 5, 2009
My last Fair Weather Jacket
Posted by vikingmom at 4:36 PM 1 comments
Labels: sewing
I love Vintage Fabric
Posted by vikingmom at 4:05 PM 0 comments
Labels: sewing
Friday, December 4, 2009
My first store bought pattern
I love the color combo of navy and red like on the Yes Man Jacket, also created by Vegbee. I have no clue what she doing in the picture.
I know that I promised a tute on the fat quarter skirt. I think my camera got the pig funk cause its not working right. As soon as I can address this issue there will be a tute on the skirt and maybe a give away.
Posted by vikingmom at 10:22 PM 0 comments
Labels: sewing
Friday, November 6, 2009
Arrrrgh!
 The Pumpkin and her buddy Banana wanted to be pirates for Halloween, so I made the girls matching pirate costumes. Whew!!! Thank goodness I'm done and don't have to worry until next year. I was in shirring hell. The backs of the faux corsets where shirred ... never again. I guess in the end they turned out cute. The skirts have 3 layers and they're poofy, thanx to a layer of tulle, and they're also twirly. I also made the Pumpkin a peasant top to wear underneath with fun flared sleeves. I didn't have the time to make the Banana one too. :(
Posted by vikingmom at 7:23 PM 0 comments
Labels: sewing


